Saturday, September 5, 2015

Connecting to Oracle Database using SQL Developer and Wallet authentication method

The story behind this post

A friend encountered a trouble opening a connection using SQL Developer to oracle database using Wallet authentication method.

The ORA error code we got was ORA-12578 TNS: wallet open failed.
After an hour of trying to troubleshoot we were able to make it work.

This post documents how to use the Oracle Sql developer while using the wallet authentication

Assumptions

  • Your Wallet already setup at the database, if you need any help see http://www.dba-resources.com/oracle/a-guide-to-oracle-wallet/
    • You should have the files cwallet.sso and ewallet.p12 files at the end of the process
  • Your Wallet storage is setup on your Client (where the SQL developer is installed)
  • Your TNS is setup with the connection to the database, example set is:
TEST_WALLET_ALIAS = 
    ( DESCRIPTION  =  
       ( ADDRESS = (PROTOCOL = TCP)(HOST = 10.10.17.2)(PORT = 5138))
       ( CONNECT_DATA = 
          (SERVICE_DATA = demo_srv)
       )
    )

  • Your sqlnet.ora have the needed configuration. Our at the client side sqlnet.ora looked like this:
WALLET_LOCATION =
    ( SOURCE =
      ( METHOD = FILE)
      ( METHOD_DATA = 
        ( DIRECTORY = c:\app\product\11.2.0\client_2\network\admin)
      )
    )

Preparing

Verifying Wallet connection is working locally

Before trying to work remotely using the SQL developer, verify the wallet is working by doing the following (NOTICE: This requires access to the database machine itself. Not always you have that access rights. If you do not, try):
  1. Connect to the machine (using SSH or Remote Desktop)
  2. Connect locally using the wallet authentication method using the following syntax:
    1. sqlplus /@<your wallet name> (For example  sqlplus /@TEST_WALLET_ALIAS
  3. If you are able to connect on the database itself continue.

Verifying Wallet connection works remotely using sqlplus

If you have installed the oracle client correctly you probably have the sqlplus client (Oracle's proprietary client).

We'll use it to verify the Wallet is working remotly
  1. Open terminal or command line
  2. Go to your oracle client installation directory. Our's was at c:\app\product\11.2.0\client_2)
  3. Go to the network admin directory.
  4. Copy the sqlnet.ora, tnsnames.ora and wallet files from the database. The tnsnames.ora should have the alias, in our case it was TEST_WALLET_ALIAS
  5. Connect using the syntax of the wallet authentication
    1. sqlplus /@<your wallet name> (For example  sqlplus /@TEST_WALLET_ALIAS

Connecting using SQL Developer

If you've reached this point, I'm assuming sqlplus worked for you at least remotely.
So, in order to make the SQL Developer use the wallet authentication we'll do the following

  1. Verify that you have environment variable named TNS_ADMIN in the system environment variables pointing to the directory where the sqlnet.ora directory resides,
    1. To configure environment variables on windows, go to Control Panel --> System Properties --> Environment Variables
  2. In the sqlnet.ora you need to direct to wallet directory.
  3. Create a wallet using the wallet manager
  4. Copy the wallet files from the Oracle database to the wallet directory
  5. Create a new advanced connection using the following format
    1. Connection Name: TestWaller (the name does not really matter)
    2. Connection Type: Advanced
    3. Custom JDBC URL: jdbc:oracle:oci /@<your wallet alias> (In our case it was jdbc:oracle:oci /@TEST_WALLET_ALIAS)

Further reading

http://www.dba-resources.com/oracle/a-guide-to-oracle-wallet/
Tuesday, August 18, 2015

How to create a Hello World with IntelliJ and Aspect J

General

Since the whole AOP programming method is new to me AND it took me a while to understand how to work with AspectJ and IntelliJ I've decided to create this brief tutorial on how to setup simple Hello World project using AspectJ and IntellJ.

The Ingredients 

  1. IntelliJ Ultimate (I used version 14, you can get it from here: https://www.jetbrains.com/idea/download/)
    1. NOTICE: You must have the ultimate edition. I was not able to use AspectJ with community edition!
    2. I hope you know how to install IntellJ, basically it's next next next.
  2. AspectJ installation (I've used version 1.8.6, you can get the installation JAR here http://www.eclipse.org/downloads/download.php?file=/tools/aspectj/aspectj-1.8.6.jar)
    1. You need to install the jar by double clicking on it in Windows or just run the command from command line 'java -jar aspectj-1.8.6.jar'
    2. NOTICE: Remember where the aspect installtion path since we'll need it later. In windows the default is c:\ (My installation was to c:\aspectj1.8)

So, let's start...

Configuration

  1. Start the IntelliJ
  2. Click on Create new project
  3. Choose Java project
  4. Don't use template, just click next
  5. Name the project AspectJDemoHelloWorld
  6. Click Finish
  7. Open the settings (in windows Ctrl+Alt+S)
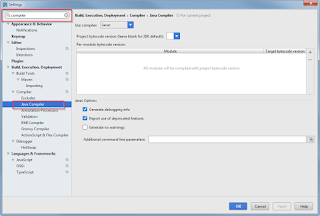
  8. Type compiler in the top search field, Chooe the Java Compiler. You should see something like this
  9. Click on Use compiler and choose Ajc (That is the AspetJ compiler)
  10. Click on the 'Path to Ajc compiler' browse button (near the Test button) and choose the 'aspectjtools.jar' at the lib directory of the AspectJ installation (In my case, C:\aspectj1.8\lib\aspectjtools.jar)
  11. Click on the Test button. You should see something like this 
  12. In the search field, type plugins. You should something like this
  13. Click on the search field inside the plugins window and type AspectJ. Verify both plugins are enabled
  14. Press ok
  15. Open the project preferences (Ctrl + Alt + Shift + S in windows)
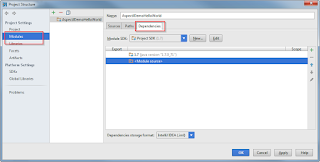
  16. Click on Modules in the left navigation pane and then click Dependencies.
  17. Click on the plus sign and choose JARs or directories.
  18. Go to the installation folder of the AspectJ and choose  the file 'aspectjrt.jar'
  19. Press OK.
  20. That's for the configuration part

Coding


  1. Go to your src directory
  2. Create a new JAVA class named Hello, Paste in the following
  3. public class Hello {
    
        public static void main(String[] args) {
            sayHello();
        }
    
        public static void sayHello() {
            System.out.print("Hello ");
        }
    }


  4. Create a new Aspect. Right click and choose Aspect (This ability was enabled due to adding of aspectjrt.jar)
  5. Name the Aspect World and click ok
  6. Paste the following in the aspect

  7. public aspect World {

        pointcut greeting() : execution (* Hello.sayHello(..));
    
        after() returning() : greeting() {
            System.out.println("World");
        }
    }
  8. Click on Build --> Rebuild project
  9. Right click on Hello.java and choose Run
  10. You should see 'Hello World' in the System console
If you only see Hello, that means the Aspect code was not compiled meaning, you should check the Ajc compiler is the compiler chosen (see step 7 in the configuration part)

Thursday, August 13, 2015

Creating javadocs without the package name before objects (with and without ant)

General


This is a simple one but from some reason it took a while to find the solution.

When creatin javadocs, by default each object comes with it package name.
If you don't want to see the package name before each object, use the noqualifier flag (thanks to http://stackoverflow.com/questions/10766238/javadoc-parameter-without-package-name for the solution)

As ant target


Example Javadoc ant taget


<target name="javadocs" >
    <mkdir dir="${dir.javadocs}"/>

    <javadoc packagenames="com.tzachsolomon.example.*"             sourcepath="-module1/src/main/java:module2/src/main/java"             destdir="${dir.javadocs}"             classpath="module1/src/main/java:module2/src/main/java"
             author="true"             version="true"             use="true"             access="public"             windowtitle="${app.name} API"             encoding="UTF-8"             verbose="false"             noqualifier="all"             doctitle="&lt;h1&gt;${app.name}&lt;/h1&gt;"/>
</target>

Thursday, May 21, 2015

JAVA - Separate log files for threads using log4j2

General

I've created this page to document how to create separate log file (in separate directory) using log4j2.
It contains a small example (1 Main thread and 2 test threads), how to and explanation how it works.

I hope you'll find it useful

This tutorial is based on the post at http://stackoverflow.com/questions/25114526/log4j2-how-to-write-logs-to-separate-files-for-each-user!

Assumptions

  1. You are familiar with JAVA
  2. You are familiar with log4j2 configuration
  3. You know how to link JARs (although I explain how to do it in IntelliJ)
Still, if you need help since something is unclear don't hesitate to contact me :)

Prerequisites 

  1. Download log4j2 from https://logging.apache.org/log4j/2.0/download.html (Current version 2.3) 
  2. Download  slf4j from http://www.slf4j.org/download.html (Current version 1.7.12)

How to:

you download the project https://github.com/tzachs/test-log4j2-threads or do the following yourself
  1. Start IntelliJ
  2. Create a new project named test-log4j2-threads
  3. Create a directory named lib
  4. Move the files apache-log4j-2.3-bin.tar.gz and slf4j-1.7.12.tar.gz to the lib directory
  5. Extract the files in the directory
  6. Create 3 classes
    1. Main.java
    2. TestThread.java
    3. MyLogger.java
  7. Create a file named log4j2.xml
  8. Copy the following to Main.java
  9. import org.apache.logging.log4j.ThreadContext;
    
    /**
     * Created by tzach on 5/16/15.
     */
    public class Main {
    
        public static void main(String[] args) {
            ThreadContext.put("logFilename","main");
            MyLogger.init();
    
    
            int i;
            MyLogger.getLogger().info("Started");
            TestThread testThread;
            testThread = new TestThread("test1");
            testThread.start();
            testThread = new TestThread("test2");
            testThread.start();
    
            for ( i = 0; i < 4; i++){
                try {
    
                    MyLogger.getLogger().debug("GUI log");
                    Thread.sleep(1000);
                } catch (InterruptedException e) {
                    e.printStackTrace();
                }
            }
            MyLogger.getLogger().info("Finished");
        }
    }
    
  10. Copy the following code to TestThread.java
  11. import org.apache.logging.log4j.ThreadContext;
    
    /**
     * Created by tzach on 5/16/15.
     */
    public class TestThread extends Thread implements Runnable {
    
        private final String threadName;
    
        public TestThread(String threadName){
            this.threadName = threadName;
        }
    
        @Override
        public void run() {
            Thread.currentThread().setName(threadName);
            ThreadContext.put("logFilename",   Thread.currentThread().getName());
    
            MyLogger.getLogger().debug("Starting new loop");
            int i = 0;
            long threadId = Thread.currentThread().getId();
            for ( int z = 0; z < 3; z++){
                MyLogger.getLogger().warn("Thread number: " + threadId + " message number " + ++i);
                try {
                    Thread.sleep(1000);
                } catch (InterruptedException e) {
                    MyLogger.getLogger().error(e.toString(),e);
                }
            }
        }
    }
    
  12. Copy the following code to TestThread.java
  13. import org.apache.logging.log4j.LogManager;
    import org.apache.logging.log4j.Logger;
    
    /**
     * Created by tzach on 5/16/15.
     */
    public class MyLogger {
    
        private static Logger logger;
    
        public static void init(){
            logger = LogManager.getLogger("test-log4j2-threads");
        }
    
        public static Logger getLogger(){
            return logger;
        }
    }
    
  14. Copy the following to log4j2.xml
  15. <?xml version="1.0" encoding="UTF-8"?>
    <Configuration status="WARN">
        <Appenders>
            <Console name="Console" target="SYSTEM_OUT">
                <PatternLayout pattern="%d{HH:mm:ss.SSS} [%t] %-5level %logger{36} - %msg%n"/>
            </Console>
    
            <Routing name="RoutingAppender">
                <Routes pattern="$${ctx:logFilename}">
                    <Route>
                        <RollingFile name="Rolling-${ctx:logFilename}" fileName="logs/${ctx:logFilename}/test.log"
                                     filePattern="logs/$${date:yyyy-MM}/app-%d{MM-dd-yyyy}-%i.log.gz">
                            <PatternLayout pattern="%d{ABSOLUTE} %level{length=5} [%thread] %logger{1} - %msg%n"/>
                            <SizeBasedTriggeringPolicy size="512" />
                        </RollingFile>
                    </Route>
    
                    <!-- By having this set to ${ctx:logFileName} it will match when filename
                         is not set in the context -->
                    <Route ref="Console" key="${ctx:logFileName}"/>
                </Routes>
            </Routing>
        </Appenders>
        <Loggers>
            <Root level="trace">
                <AppenderRef ref="RoutingAppender"/>
            </Root>
        </Loggers>
    </Configuration>
    
  16. Link the libraries. In Intellij you'll do it by doing the following:
    1. Open the Project Structure (Setting). In Ubunutu you can press Ctrl+Alt+Shift+S
    2. Go to Modules
    3. Press on the Dependencies tab
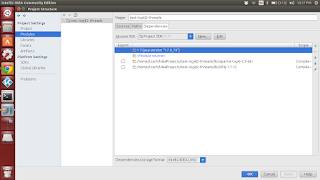
    4. Click on the plus sign and add the JARs. You should see something like this in the end of the process.
  17. Click on build --> Make (Or Ctrl+F9)
  18. Press on the run (or Shift+F10)
  19. You should see a directory named logs  created with the following structure:
    1. logs
      1. main
        1. test.log
      2. test1
        1. test.log
      3. test2
        1. test.log
  20. Notice that each test.log has messages only from it's own thread
  21. That's it :)

Explanation

So what is actually going on?

As you can see, I've used Routing Appender which is named RoutingAppender in my example.
The pattern to of route is depended on the variable in each Thread context named logFilename.

Notice that I do not handle any thing related to the creating of the files or the directories, it is all done by the log4j2.

All you need to do, is to put a name of the directory you want be created for each Thread, for example, Line number 9 in class Main.java:
ThreadContext.put("logFilename","main")

By typing "main", I've decided that all the logs for the main thread will go to the directory logs/main

For more info see https://logging.apache.org/log4j/2.0/faq.html#separate_log_files